Monday, May 31, 2010

Fill this day with JOY

Two months ago I won a prize pack from Papertrey Ink.
Waaaaaaaaaaaaaahhhhhoooooooooo!!!
I just got my stamps the other week and I had a bunch of
cards to make, so I broke out the new sets.
I am so in love.
*Sigh*
This card was totally inspired by this lovely one
(which just happens to be sitting on my windowsill,
am I allowed to brag? {grin} ). Looking at my picture
now, I wish I had rounded the corners, but the cards
already in the mail, so it's a little too late! Speaking
of rounded corners, what tool do you use for corner rounding?
I have the SU! corner rounder punch and, I must say, while
I'm really happy with almost all of my SU! products, this is
one that is just not my favorite. Maybe I'm not using it
right, but often it won't punch totally straight or give
a nice, clean edge. I use it a lot, so a different corner
rounder is definitely on my wish list. Any suggestions?

Anyways, back to the card...
First I stamped the background using my very
first Hero Arts stamp...a thoughtful and generous
gift from this awesome girl ... and then used pale plum and
old paper ink to distress the edges of the base.
I stamped the violet image on pale plum cardstock
using elegant eggplant ink and then embossed with
clear embossing powder. I cut it out and used my
blender pen to add a bit of shading, then curled up the
edges to give it some dimension. Lastly I added some
purple rhinestones to the center and popped it up with
some foam glue dots. Next I stamped the leaves with
old paper distress ink on mellow moss cardstock and cut
them out. I crumpled them all up and then smoothed
them out again, distressed the edges, and then tucked them
right in underneath the flower. Finished it off by tying on
a bit of linen thread and adding a sweet little button.
Stamped that lovely sentiment and that's it!

Thanks for visiting and hope you're staying cool!
Our house doesn't have air-conditioning, so in the heat
of the day we've been hanging out in the basement, which
is where our guestroom/my craft room just happens to
be. If this heat keeps up, you just may be seeing more
cards that usual popping up around here. Sound just
about right to me! Have a great Monday!

Friday, May 28, 2010

Grandpa's Mojo-licious Birthday :)

I needed a card for Grandpa's birthday today and I still
had this Mojo Monday sketch in my head.
Let me tell you, I sure wish I had finished this card up on
time to enter the challenge because....I love it!
(Nothing like talking up your own work, eh? LOL!)
Anyways, here's my take on the sketch:
I embossed the white panel with SU!'s embossing folder.
distressed the edges and then sewed it onto the card front.
I really like the cleanness of the white-on-white. Then I cut
the kraft rectangle and glued on the four squares in various shades
of green and blue and stamped the flower with Versamark
Dazzle. I added the little sentiment tag, and done!
Clean and simple, but still special...for a very special man.
Happy birthday, Grandpa!!

Tuesday, May 25, 2010

Fan Mail

I needed a card for a young teenage boy from our church...
Aaack!! I don't think I've ever made a card for a teenage boy
before! Where to start?? Well, I knew which stamp I wanted
to use. I love the 'Puns from the Past' stamp set from SU!. It's
not one that I use all the time, as the stamps are pretty
occasion specific, but whenever I do pull them out I get a
serious case of 'Rubbah Love' :) The vintage sketches and
witty sentiments are just my style! Needless to say,
I love this card!!

I used the design from the SU! catalogue for this stamp
set as my starting point and then started switching
up colours to make it 'teenager worthy'. I was really
excited with the finished card - love that little banner!
I remember being encouraged at church when I was a
teenager, it meant so much to me at a time when you're
trying to figure out who you are and what your gifts are.
Hopefully this card will do the same for our church's young
drummer. This card makes me excited to do some more
creating for the young people at church, something I've
been kind of hesitant about in the past.

And, while I'm on the topic of encouragement...
If I could, I would send this card out to all of y'all :)
I so appreciate the time you take to come and visit
'The Scrapyard' and the comments you leave.
I am so inspired by all of you, and so it means so
much to me when you leave a note for little 'ole me!
Thanks for all of your encouragement.
I'm your biggest FAN :)
xo

Monday, May 24, 2010

On a Roll with the May HCCC

Another great month, another great challenge - thanks Marnie!
This card needed to use the colours grey, yellow and white
and some paper pieRcing :)
I didn't own any grey paper or ink and thought this would be a
perfect opportunity to add to my supplies, BUT a challenge is
a challenge and so (with a little bit of help) I managed to
make up this card without purchasing anything!
For the 'grey ink' I simply used my black ink and then
stamped off once on a scrap piece of paper before stamping onto
the card. Voila - grey ink! Love it! The grey paper came courtesy
of sa-weet friend, and I punched out some circles
and then stamped and distressed them with my 'stamped off'
black ink. I freehand pierced around the image - I wish I
had a template...I'm a bit of a perfectionist. So, that's not my
favorite part of the card. I ended up drawing a grey 'thread'
with a pencil to make it look like faux stitching.
Anywho, I did have fun with this month's challenge
and I'm excited to get this card in the mail for a friend
I haven't seen in awhile. Love that sentiment!

Roll on, Duke Divas, roll on!

Supplies:
Paper: Whisper White, Barely Banana (SU!), Grey (Marn's stash)
Ink: Barely Banana (SU!), Black (Stazon), Old Paper (Tim Holtz Distress)
Stamps: the swirly woosh behind the roller skates (Bronc Buster - SU!),
diamond pattern, polka dots, roller skates, sentiment (Unity)
Other: Spiral punch, 1" circle, 1 1/4" circle, 1 3/8" circle (SU!), yellow rhinestones (Marn's stash), blender pen

Saturday, May 22, 2010

Mother's Day cards

Mother's Day has come and gone, but I thought
I would share the cards I made for our moms.

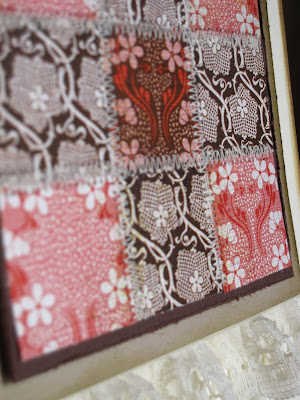
Peter's mom loves to quilt and I wanted to try
a paper-pieced version of a quilt square:
I really like how it turned out!

The card, however, was a bit of a flop.
I think the handwritten sentiment just made the
whole card look kind of kitschy. I don't think I'll
do that again anytime soon. But, Mom liked it,
so I guess that's what matters :)

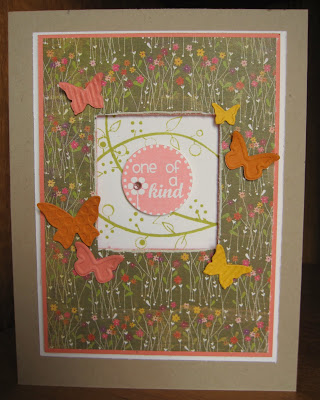
For my mom, I picked a patterned paper that
I thought she would like and a stamp that fit her
perfectly and just went from there:
I recently got the butterfly die from Stampin' Up
and couldn't wait to try it out. And let me just say,
I love it!!! I think we'll be seeing a lot of little butterflies
fluttering around my cards in the next while .

I love how they just pop off the page and add
so much dimension. I popped the whole patterned
paper window up off the card front and stamped the
vine image behind the panel. I popped the sentiment
circle up as well and added the little rhinestone to the
center of the flower. A very bling-y, pop-y one-of-a-kind
card. Perfect for my mama!


Housewarming Gifts

Last week I went to visit two of my friends
who just moved into new apartments. I wanted
to bring along a little housewarming gift and
originally thought I would give them plants
to cheer up their places. However, after thinking
about it, I didn't know what their apartments were
like - did they have sunny windows? front stoops? -
and did my friends even like plants? Not everybody
has a green thumb, you know ( I can testify to
this, as I have killed many a well-intentioned
blooming gift)! So, I put my thinking cap on, really I
did, and came up with these little ditties:
I had some 4x6 wood frames from Ikea and
just made up a little somethin' somethin' that
they could hang on their wall. I painted and
distressed the frames and tried to create something
that fit their personality and would be happy to
look at :) I think that at 50 cents a frame,
they made a pretty special, and yet incredibly
inexpensive, gift. Perfect!

The second frame I left bare, just sanded and rubbed
in a bit of distress ink on the edges.

I used the emboss resist technique for the flowers and
sponged over them with Baja Breeze (SU!) and Vintage
Photo (Tim Holtz) ink. I absolutely love this one! And,
crazy thing was, it ended up being a perfect match for
my friend's apartment! Love it when stuff like that happens.
The sentiment (Unity) was also stamped in the Vintage Photo
ink and I hope it will be a special reminder for my friend
that she is loved! I'm so glad I didn't go with my initial
thought of houseplants - these homemade frames were
much more meaningful...and much less costly!
I love this craft!!

Tuesday, May 11, 2010

For Mom's scrapbook - Part 2

These last two pages were toughies! I wanted to use some
pictures from my Oma and her funeral, but wasn't quite
sure how to share them in a meaningful and gentle way.

This first page was the trickiest. I had a really beautiful
picture that I took of my mom holding Jude and sitting beside
my oma. It was taken a few days before my oma passed away
and it speaks volumes of my mom's love for her family, lovingly
caring for her mother and grandson. The picture is one I treasure,
but it's not an easy one to look at. Oma was very sick at the end
and most of the time was not even conscious. I so wanted to have
this particular picture - the precious moment and memories it
holds - included but knew, because of how Oma looked, that to
just put it on the page wouldn't work. First I tried covering it with
a piece of vellum to try and soften the shot, but it just made
everyone look like ghosts - not good! I finally came up with the
idea of the pocket to hold the picture and a tab on the top of
the picture so mom can pull it out when she wants to look at it.
The rest of the page is very simple and muted, keeping with the
tone of the picture. Mom bawled when she pulled out the picture
and she said she really loved having it in her scrapbook, but also
the way it was quietly tucked away in the page.

The next picture was taken at Oma's funeral. I just think it's
so precious - our two oldest and my cousin's two children
placing flowers down into Oma's grave. It was such a special
and beautiful way to say good-bye.

I created the ruffly little flower by punching out about 8
scalloped circles out of vintage book print and attaching them
together with a brad. I ruffled and crumpled up the top layers
to give it some dimension and inked the edges with some
distress ink. Love the way it turned out and how it looks on
the page. And I finally got to use my Martha Steward dove
punch! I love this sweet little bird, but have had a really hard
time incorporating into cards because of it's size (looks like a
freaky giant-bird paired with most of my flower and tree
stamps), so I was really happy to be able to use it on this
project. Well that's it for the scrapbook pages for now!
I have one more set from my brother's wedding, but I
have a feeling it will be awhile before I finish them...
the nice weather has returned and we'll be back outside
mowing lawn, working in the garden, and pushing four
little bottoms on the swings. As much as I enjoy crafting,
I LOVE working and playing outside with my family!
Hope you're enjoying the weather too!

Monday, May 10, 2010

Gracie Jo's pages for Mom

I used to keep 'The Scrapyard' off limits to all the
kids, but after Gracie Jo went and visited my sister-in-law
and came back with the cutest and most beautiful cards (in
my completely unbiased opinion anyways) for our family,
I realized that this hobby that I so love is something that
I could totally be sharing with my little girl. Thank you Tina!!
Anyways, Gracie Jo now has her own little chair and corner of
the Scrapyard and, while she doesn't have free reign on all my
supplies, she is coming up with some lovely creations using
paper, glue, scissors, stamps, ink and punches.

Here's the first page she made for Mom's scrapbook:
Isn't it adorable? And she did it all on her own (except for
a little bit of help with the journalling)! She's such a sweet muffin :)

And here's the second page. Her own 'illustration', as she
calls it, and her favorite embellishments. Needless to say,
Mom absolutely loved having a new contributer to her
scrapbook and Gracie Jo and I had some sweet bonding
time in the process. Love it!

I'll be back later with the final two pages.
Hope you had a wonderful weekend thinking
of, or celebrating with, your moms!

Friday, May 7, 2010

For Mom's scrapbook - Part 1

I made my mom a scrapbook for her 50th birthday and
have been adding to it for birthdays, Christmas, Mother's
Day, etc. ever since. Right now it's the only scrapbooking
I do and every time I think, 'I should do more of this!'
But, alas, there always seems to be other things (namely
our four little crazies) that demand my attention, so it's
not something that I've done a lot of, other than for my mom.
Maybe when I turn 50 I'll start my very own scrapbooks - Ha!
Oh yes, sorry for the bad pictures. I should've taken the pages
out of the glossy holders, eh? Note to self: Glossy page holders
do not make for good pictures! Anywho...

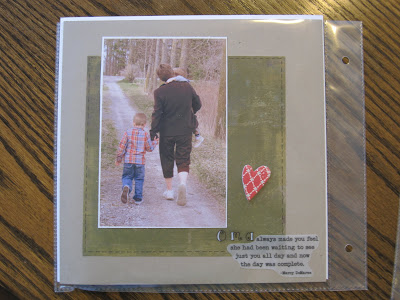
I love this picture of my mom with the two boys - they just
love her so much! And she has so much love for them.
The quote says, "Oma always made you feel she had been
waiting to see just you all day and now the day was complete."
It originally started with "Grandma", so I trimmed that out and
replaced it with stickers to say "Oma". I kept the page pretty
simple, because I wanted the picture to be the main focus, and
I added the heart to tie it together with the opposite page.


My dad's name is John William (Johan Willem) and our
littlest guy is Jude Willem. Mom always refers to them as
her 'two favorite J.W.'s', and as soon as I saw this picture I
knew that would be the theme of the page. Although what's in
your head doesn't always play out on paper... This page
is actually a whole bunch of mistakes which I valiantly tried
to work with since I had already glued my only copy of the
picture down! The white journalling tag is covering up a big
splotch where I dropped a big blob of glue, and some very
bad handwriting. Also, after attaching the ghost hearts with
clear glue dots (which were totally visible and silly looking)
I started adding more and more hearts to cover things up.
Well, considering it's not at all what I had planned, it turned
out alright and I do like the flow of the two pages together.

Gracie Jo made some pages too! So cute - I'll try and post them later.
Hope you don't mind my little foray into the world of scrapbooking!
Thanks for stopping by!

Wednesday, May 5, 2010

Mama's Birthday

My mom's birthday is May 1st and I needed the perfect
card to celebrate such an amazing woman. She really appreciates
things that are hand made, and the thought that goes into
them, so this card needed to be extra special!

I used the layout and ribbon idea from a card by
Nichole Heady, and tried to pick elements that would
have special meaning for my mom. Both of her parents
passed away in the last two years, so her birthday has
been a bit difficult for her because of their absence.
My Opa's favorite flowers were daffodils, and I didn't
have a daffodil stamp, so I tried to create the look of one using
the retired Delight in Life set from Stampin' Up. I stamped
the flower on the cardstock then coloured it in with my blender
pen. Then I stamped it again on vellum, coloured it and cut it
out. I bent the edges up a bit to give it some dimension and
then added the center which I stamped on Summer Sun cardstock
with More Mustard ink. I crumpled the center up a bit and used some
Old Paper distress ink on it, and I really like how all those extra
steps created such a pretty, detailed focal point.

I embossed the white panel on the front, and used some
pattern paper from Basic Grey's Nook and Pantry line,
along with some strips of Chocolate Chip cardstock that
I punched with my scalloped edge punch. All together it
had a warm, vintage-y kind of look that reminded me
of my Oma's sewing room. Anyways, my mama really
did love the card so it was worth the extra fuss.

I also made some pages for her scrapbook, so
I'll try and get those posted as well. It was good to
get some extra crafty time in last week, but now I
need to get caught up on laundry and housekeeping.
*Sigh*... if only there was a fun, creative way to keep
the house clean, laundry done and meals on the table!
Here's to wishing!